

Creating Discovery Bottles in a Kitchen Mad Scientist Lab
By Blog Editor Susan Wells
Baby Soda Bottles get their name because they are actually plastic soda bottles before they are heated, stretched and blown up into the plastic bottles we all know. These perfect test tubes are large, clear and unbreakable. They can be dropped, kicked, stepped on and even thrown in the dishwasher.
To go from Baby Soda Bottle to soda bottle, the tube is placed into a vacuum mold and heated. Then, very hot air is blown into it, stretching the plastic like a balloon so it fills the inside of the mold. The tube grows to about 40 times its original size. When the plastic cools, the mold is opened and the bottle falls out ready to be filled with a delightfully refreshing liquid.
Baby Soda Bottles make the perfect test tubes for science experiments and activities. Mix concoctions, stack liquids by density, or create a liquid laboratory in the Baby Soda Bottle. Teachers will send home a Baby Soda Bottle with each student to see what use they can come up with as homework.
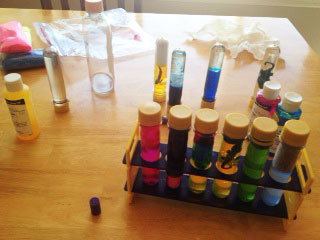
For a summer fun project, my 8-year-old and I took out several Baby Soda Bottles, different oils, and materials and started our own mad scientist kitchen laboratory. Here’s what we started with –
Materials
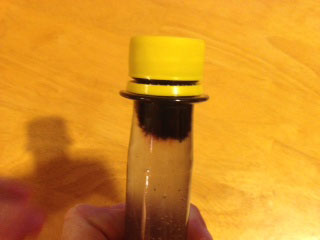
- Baby Soda Bottles and Rack
- Water
- Mineral Oil
- Baby Oil
- Vegetable Oil
- Rubbing Alcohol
- Wax Beads (found at craft stores)
- Color Fizzers, True Color Tablets
- Insta-Snow
- Growing Alligators
- Pinch and Mix Colors
- UV Beads
- Jelly Marbles
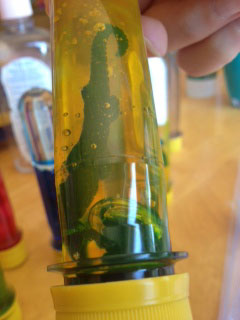
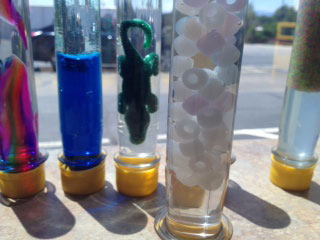
I began by trying to mix two things together – beads and water – for example. My 8-year-old wasn’t going to be held back by order and ingredients. She mixed Insta-Snow, water a Growing Alligator and some yellow Pinch and Mix paint. Then she set it in the rack and watched for changes. She took the approach of “what will happen if…” which is what science is all about. While I stopped to think, what would mix well together, she just started adding things. This process yielded some huge discoveries. We made REAL discovery bottles. The best part? I took her to the Steve Spangler offices and encouraged her to share with the staff. She was proud and so engaged to stop and share her discoveries with every adult she found.
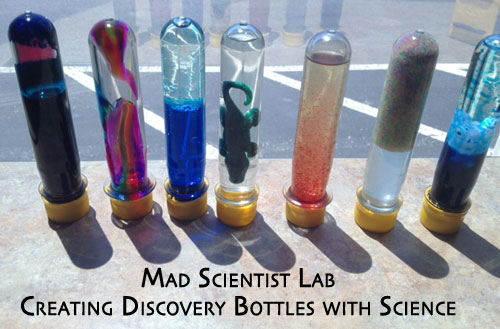
Baby Soda Discovery Bottles
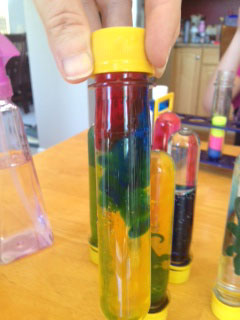
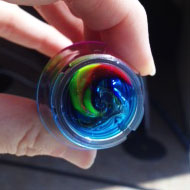
- Rainbow Tubes – Squeeze the pinch and mix colors into the tube and watch them mix and turn into all of the colors of the rainbow.
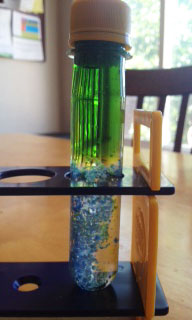
- Wave Tube – Fill a bottle half way with water, drop a True Color Tablet to change the color, add beads (we used UV Beads) and fill the remainder with baby oil. Discovered UV Beads do not change color when in baby oil.
- Alligator in a Tube – Place a Growing Alligator in the tube and fill with whatever you want to try. We created a control with one alligator in water and then did another tube with one alligator in Pinch and Mix paint.
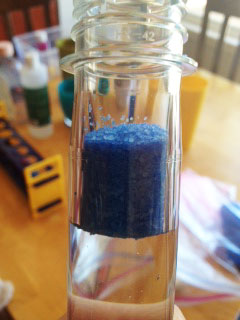
- Time Tracker – Filled tube with a pinch of Insta-Snow and water. Dropped food coloring at the top and watched it drip down through the snow. Timed how long it took to travel all the way down.
- Captured Bubbles – Fill test tube 3/4 with water and added a True Color Tablet then topped off with Mineral Oil. The oil is less dense than other oils like vegetable or baby.
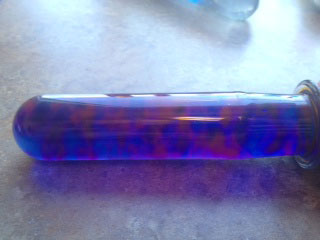
- Plasma Tube – Squeeze a lot of blue and a little bit of red Pinch and Mix Color and shake.
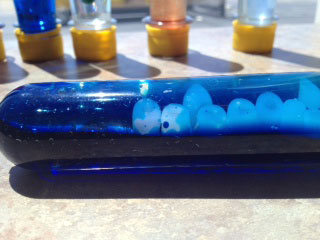
- UV Bead Sun Catcher – added a handful of UV Beads and filled tube with water. Take it out in the sun and watch the beads change. Do they change as quickly or as brightly as beads outside of the tube and water?
- Eggs in a Bottle – dropped in a few Jelly Marbles and filled tube with water. After the Jelly Marbles were full sized, we added a True Color Tablet to change the color of the water.
- Magic Wand – Filled tube 3/4 full with water, added a tablespoon of wax beads and topped off with rubbing alcohol.
Here are some additional ideas to try –
- Bubbling Colors – Use commercially available Color Mixing Tablets to color the water in each test tube. Tub Tints are commonly found in department stores in the toy section. They are made out of a special kind of dry food coloring that won’t stain your hands. These colored tablets fizz when you drop them in water because a chemical reaction takes place between the water and the tablet, producing carbon dioxide bubbles.
- Magnifying Glass – Fill the test tube to the very top with water and seal it with a cap. Hold the test tube up against newspaper print to magnify the letters. The water magnifies the message.
- Make Your Own Twister – Fill the test tube 3/4 full with water and add a few drops of liquid soap. Seal the bottle with a cap and start twisting. The swirling motion of the soap and water will make a twisting, turning vortex. It’s your very own pet tornado!
- Dancing Beads – Fill the bottle half full with small Styrofoam Balls (like those found in bean bag chairs). Add water until the beads begin to overflow the bottle. Seal with a cap and watch the Styrofoam beads jockey for position in the bottle.
- Sands of Time – Place layer after layer of various colors of sand in the test tube to make a colorful rainbow.
- Rhythm Tube – Fill the test tube with an assortment of beads, pebbles, nuts, bolts… you name it. Seal with a cap and start shaking. Experiment with different materials as each will make its own unique sound.
- Color Shake-up – This activity requires a small amount of colored lamp oil. Be careful not to get the lamp oil around any open flames. Fill the test tube with equal parts of lamp oil and water. Food coloring can be used to color the water (the oil cannot be colored with food coloring). If you are using yellow lamp oil, color the water with a few drops of blue food coloring. Seal the test tube with a cap and shake up the liquids. Yellow and blue makes green.
- Glitter Wand – Fill the test tube 3/4 full with cooking oil and add an assortment of colored beads, glitter, and Mylar confetti. Top the tube off with cooking oil and seal with a cap. Tip the tube back and forth to make your glitter wand sparkle
- Underwater Flashlight – This is the perfect activity for the person who loves building circuits out of batteries and bulbs. Construct a simple circuit using a light, some wire, and a AA size battery. Place the glowing lightbulb circuit into a clean, dry test tube and seal it with a cap. You’ve just made a waterproof flashlight.
- The Erupting, Bubbling Blob – This activity uses the Color Mixing Tablets mentioned in Bubbling Colors. Fill the test tube 3/4 full with cooking oil (ordinary vegetable oil works well). Add one cap full of water to the oil in the test tube. Notice how the oil and water do not mix. Drop one of the Tub Tint colored tablets into the test tube, but do not seal the tube with a cap just yet. Watch what happens to the bubbling water on the bottom of the tube. After the lava blobs have stopped bubbling, fill the rest of the tube with oil until it’s almost overflowing. Cap the tube tightly. Tip the test tube back and forth and watch what happens. The tiny droplets of liquid join together to make one big lava-like blob!
- Rain Gauge – Use a permanent pen and a ruler to mark off half inch increments on the test tube. Put the tube in an open area outdoors to collect and measure rainfall.
- Message in a Bottle – Place a message in the test tube and seal it with a cap to make it water tight. Float the message in a bottle to a friend… across the pool!
- Layers of Fun – Fill the test tube with different liquids to see which liquids mix or layer on top of each other. How many individual liquids can you layer? What happens when you add ketchup to cooking oil and waffle syrup? You make a mess!
- A Discovery Tube – Use the test tube to collect all sorts of goodies on your next nature walk. Use the test tubes to collect dirt samples, leaves, or good ol’ bugs!
- Liquid Laboratory – Use the test tubes to collect samples of water from ponds and streams to study later using a magnifying glass or microscope.
For many more ideas and activities for Baby Soda Bottles, please visit the experiment page.
How do you use unbreakable Baby Soda Bottles?

Leave a Reply
Want to join the discussion?Feel free to contribute!