Five Ways to Inspire a Child's Inner Scientist
By Kristin Fitch of Ziggity Zoom
Kids are experts at asking questions. A typical 3 year old will ask why non-stop. Why does that work like that? Why is that man so tall? Why do I have to do it? The questions and their inquisitive nature are amazing. So why not harness that curiosity and introduce your children to fun things that will get them thinking.
If you want to nurture your child’s inner scientist, then it is important to get your kids involved in lots of different activities, such as art, baking, planting, creating, and reading. Here are five activities that your kids will love to do and will actually be learning how to be a better Scientist by observing, measuring, building, testing, and creating. While you are at it go ahead and bring out your inner scientist and have some fun!
Edible Structures
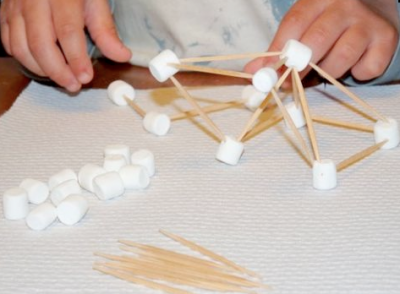
Want to get your kids excited about structures, DNA, or any other model? Use everyday items to let them build it or let them build anything they want. It helps to show them something you have built first. You can use pretzel sticks and mini-marshmallows so they can eat the entire model when you are done or you can use mini-marshmallows and toothpicks and they can eat the marshmallow when they are do.
You will be amazed at how long your kids or class will do this activity for. It is a great way to introduce science concepts into playtime.
 Art
Art
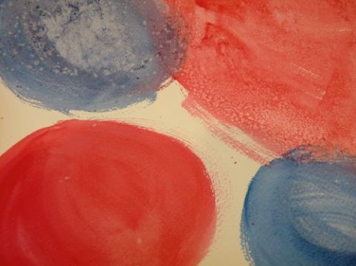
An easy way to encourage observations and discovery is in art. Use water colors and different items such as salt to see how a painting is changed. To create interesting art with new effects you will need heavy weight paper, a paint brush, water color paints, a small cup of water, a towel and salt in a salt shaker.
Allow kids to paint their picture- ensure they do not use too much water as the colors will be dull and the salt will not leave an obvious mark. Once your child is done painting, but while the painting is wet sprinkle salt over the whole painting or a part of it. Wait for the painting to dry all the way and then gently brush off the salt.
You can try using other kitchen/craft items that will give you new effects and teach you a thing or two about science.
In this case, the salt absorbs some of the moisture (or paint). Or you could try using a crayon on your paper before painting (the wax will not allow the paint to be applied where the crayon (wax is colored)). We also tried using a little baking soda and painting over a colorful painting with vinegar- we got lots of fun bubbles and the color feathered. This is a fun Kids Craft Project.
 5 Minute Ice Cream in a Bag
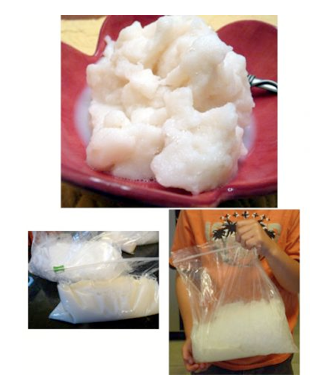
With just a few ingredients and a little shaking, kids can make their own ice cream. This is a great group project and one that is always fun and amazing! This is a fun treat for kids and its a great subtle lesson in states of matter (frozen, solid, liquid) and how they change or what is different about the different states.
Need:
Amount Needed per Person:
For Ice Cream:
- 1/2 cup milk
- 1/2 teaspoon vanilla
- 1 tablespoon sugar
For Bag:
- 4 cups crushed ice
- 4 tablespoons salt
Bags:
- 2 quart size Zip-loc Baggie
- Gallon size Zip-loc Freezer bag
What To Do:
Mix together the milk, vanilla and sugar in one of the quart size bags. Seal tightly, removing excess air. Place this bag inside the other quart size bag, again removing excess air and sealing well. By double-bagging, you reduce the risk of salt and ice leaking into the ice cream. Put the double bag inside the gallon size bag and fill the bag with the crushed ice. Sprinkle the salt on top. Remove excess air and seal the bag. Shake and the bag, making sure the ice surrounds the cream mixture. Within 5 to 8 minutes you will have Ice Cream! If bags get too cold to hold, wrap with a paper towel or use oven mitts to hold the bag. Flavorings can be added to the ice cream to make different flavors (add flavorings, such as chocolate, while adding the other ingredients to the bag before shaking). Kids can experiment and make a different flavor every time. This is one of our favorite family activities and everyone gets involved.
 Grow Something
Egg Shell Garden
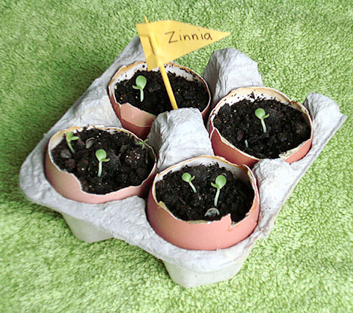
Eggshells are perfect little containers for seedlings. Let your little nature lovers start their own garden from seed and watch them grow.
Need:
- Discarded eggshell halves
- Egg carton
- Soil
- Seeds (choose seeds that sprout in 7-10 days)
- Teaspoon
- Scissors
What To Do:
- Cut egg carton bottom to hold desired number of egg shells.
- Wash eggshells gently in a mild soapy solution. Rinse and pat dry with paper towels or let air dry.
- Using a teaspoon, fill each eggshell with up soil up to 1/2 inch from the top.
- Put shells in place in egg carton.
- Place 3 or 4 seeds in each eggshell. Then place 1/4 inch of soil over seeds and gently pat down.
- When all shells have been planted, water lightly and place in a sunny window sill.
- Make sure your child waters each shell daily with a teaspoon of water. (more if soil is drying out quickly)
- Once seedlings emerge they may be planted outdoors if it is warm enough in the season. Or if this is a winter project, plant them in a pot to watch them grow indoors. (Make a small hole in bottom of eggshell or crush bottom to allow roots to spread when planting.)
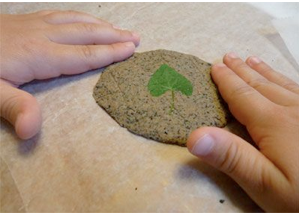 Make Fossil Prints from Kitchen Ingredients
Need:
- 1 cup Flour
- 1/2 cup Cooled Coffee
- 1 cup Coffee Grounds (used)
- 1/2 cup salt
Collect: Twigs, Leaves, Shells, Tiny bones or toy dinosaur bones
What To Do:
- First, have the kids go outside and search for treasures to make into their Fossils. Good things to use are twigs, leaves, shells, tiny bones, hard-shelled bugs.
- Next, measure all ingredients and put into a bowl. Stir well. If the mixture seems a little too moist (it should resemble a dough consistency), add a little more flour. Knead until smooth.
- Work the dough into smooth balls and then flatten on a piece of waxed paper.
- Press objects into the clay, using one or more of the collected items. Remind kids to share. Allow all fossils to dry thoroughly before removing from the waxed paper.
- These are fun fossils for kids to display on a dresser or shelf.
Here is an extra idea to encourage family time while also encouraging out of the box thinking.
What is It Game?
At Dinner play a simple game called What is it/What could it be?
Each evening find something from around the house (anything- a kitchen tool, a empty paper towel roll, rubber band- anything).
And put it in the middle of the table. Ask each person to take turns says what the item could be used for.
For example, a paper towel roll might be a megaphone, viewing scope, could be used to store things on it, and so on.
And each time you play, you can let a different person pick the item to talk about.
You can even get your kids to eat if you tell them to play the game you have to be eating.
By Kristin Fitch
From ZiggityZoom.com
For more Fun Kids Crafts from ZiggityZoom
Follow ZiggityZoom on FaceBook
Follow ZiggityZoom on Twitter
 Kristin Fitch is the co-creator and editor of several successful national web sites. ZiggiyZoom.com is a fun and educational site for children and their parents. It is also a resource site for teachers and homeschool parents. The site offers educational printables, games, crafts, activities, and more for families.
NationalKindergartenReadiness.com is a site for parents and teachers with resources to help prepare children for school, including printables, skills to learn, articles, and educational games.


Loved your simple science activities and I am looking forward to using some of them very soon. It was really good to have some activities that use materials that are readily available in most homes.
Thanks,
Ann