Eggceptional Eggs-periments – Dying Easter Eggs Naturally
By Blog Editor Susan Wells
Go into any grocery store or department store this time of year and you will be bombarded by Easter egg dye kits. Most of these kits use vinegar and an artificial dye to color the shell of the egg. I know I’m not the only one who gets concerned when I crack open my Easter egg for egg salad and see blue splotches on the egg white.
We are bombarded by artificial dyes in everything from fruit snacks, candy, mac and cheese and soda. Artificial dyes like FD&C Red No. 40, or Tartrazine Yellow No. 5. These synthetic colors are made from petroleum and other chemicals. These dyes have been found to cause cancer, hives, hyperactivity and other issues in adults and children.
My friend, Amy Gates, who blogs at Crunchy Domestic Goddess, developed a system for coloring eggs using dyes from nature. Not only is this safer and less toxic than the store bought dyes, this also uses a little science and know-how to put it together and make it work.
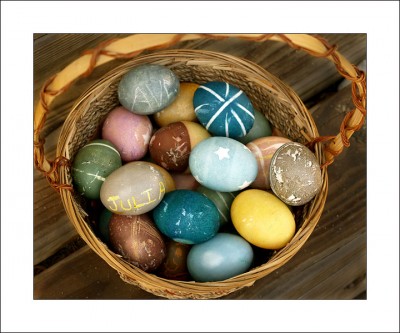
This is more time consuming, but it produces a lot of family togetherness time along with brighter, deeper colors. Here are the organic sources Amy used and the colors they produced.
RED – 3 cans of beets in cranberry juice (instead of water) – produced a dark reddish hue
PINK – Frozen cherries – made a very light pink
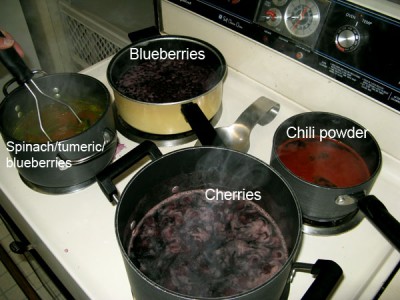
RED-ORANGE – 3 tablespoons of chili powder produced a nice reddish-orange color
YELLOW – 3 Tablespoons of tumeric produced a great yellow
GREEN – A mix of spinach leaves, canned blueberries and their juice and a few tablespoons of tumeric produced a gorgeous earthy green color – I think it would work without the spinach leaves, but I happened to have some that were wilting so I threw them in.
BLUE – 3/4 of a head of red cabbage (chopped) made a beautiful blue
GREY BLUE – 2 cans of blueberries and their juice made a grey-blueish color
GREY – Frozen cherries mixed with blueberries yielded a grey color
There are two methods Amy describes in her post, a hot and a cold method. The hot method will hard boil the eggs as they absorb the color, in the cold method, you will need to cook the eggs first.
Method 1—Hot
Place eggs in a single layer in a large, nonaluminum pan. Add the dyeing ingredient of your choice—it’s best not to mix until you are comfortable with experimenting. Cover the eggs and other dyeing “agent(s)” with one inch of water. Add 2 tablespoons of white vinegar per quart to help the color adhere to the egg, and bring to a boil. Next, simmer for 20–30 minutes or until the desired shade is achieved. If you cook the eggs longer than 15 minutes, they will become rather tough.
Method 2—Cold
The cold method is the same as the hot method with the following exception. Once ingredients have simmered 20–30 minutes (depending on desired shade), lift or strain the ingredients out of the water and allow the water to cool to room temperature though you may wish to try keeping the ingredients in the colored water to give the egg more texture as the dye will become concentrated in areas where the vegetable touches the egg. Submerge the eggs until the desired color is achieved. You may keep the eggs in the solution overnight as long as it is refrigerated.
The longer the egg stays in the dye, hot or cold, the deeper the hue will be. Using vinegar will also help the color deepen.
For complete directions and how to’s, visit Crunchy Domestic Goddess.
This is true kitchen science. Use the list above as a guide and then start experimenting. Pull out the spices, the vegetable drawer. Start cooking and testing. Then come back here and leave us a comment explaining what you used and your results.


Onion skins will give your a nice light brown color. I usually toss some into my water year-round when boiling eggs, just to make it easy for my family to ID which eggs are hard boiled, and which are not!
Kerry – That’s a great idea. I’m going to use it. Thank you for sharing