

Growing Bacteria in Petri Dishes – Biology Experiment
Growing Bacteria in Petri Dishes Science Experiment
Growing Bacteria in Petri Dishes
Looking for a hands-on science fair projects that will really wow friends and family? Nothing will beat the bacteria experiments from Steve Spangler Science. Our super fun projects and bacteria culturing experiments are easy, safe and fun. Help your young scientists experience amazing and memorable bacteria growth before their eyes. Get creative and find different places to test with this fun, surprising experiment.
Culturing Bacteria in a Petri Dish With Agar
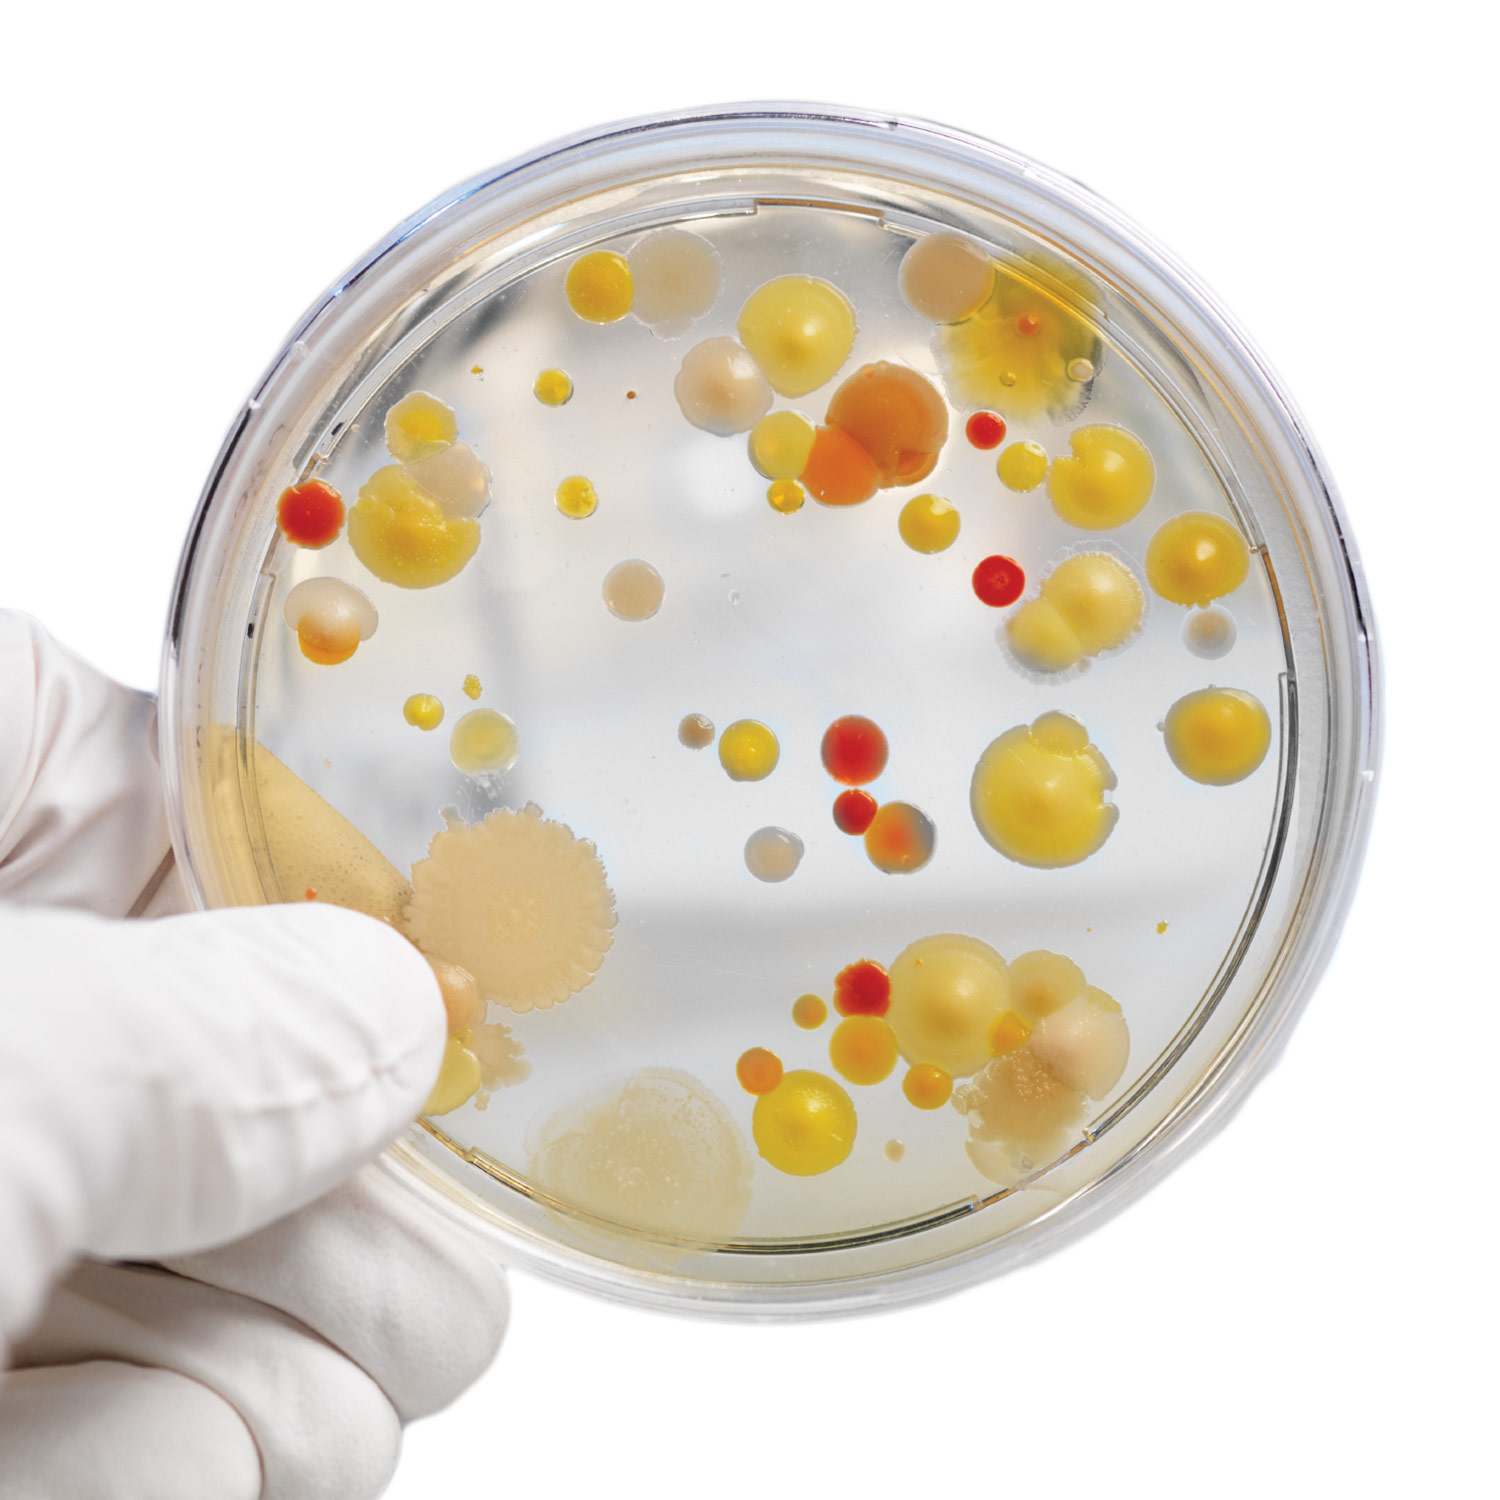
Bacteria can be collected from just about any surface and grown in a substance called agar. By growing, or culturing, the bacteria, it’s easier to see what types are present and in what quantities. In the Growing Bacteria in Petri Dishes experiment, you’ll collect samples around you, then test them and see what bacteria will grow. Test toilet seats, doorknobs, refrigerator doors, faucet taps and other surfaces in your home or school to see what fomites are lurking on the cellular level.
Science Experiments at Steve Spangler Science
You just never know what’s going on at the level of microbiology. It may be shocking when you see a petri dish quickly fill with bacteria. With this experiment, you will likely realize that your mom was right to tell you to wash your hands with soap and warm water. This easy-to-use science experiment uses a petri dish prepared with nutrient agar, a seaweed derivative with beef nutrients added. It’s an ideal way to reveal the bacteria hiding all around you.
Bacteria Experiments and Products
Follow the step-by-step instructions below for a experiment that kids of all ages will remember. For an all-in-one solution, be sure to check out our Growing Bacteria science kit. Need additional supplies to keep the fun going? Order extra petri dishes from our comprehensive selection of lab supplies at Steve Spangler Science.
Experiment Materials
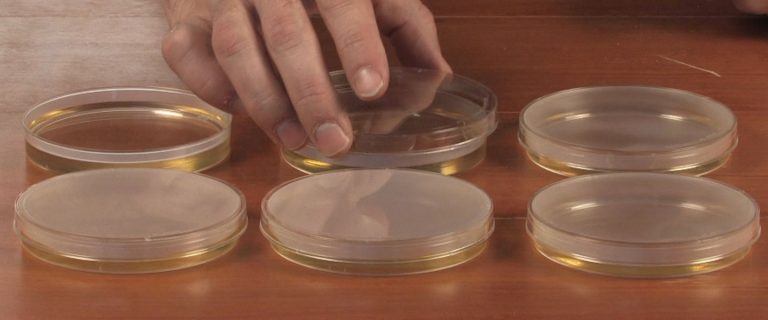
- Petri dishes, 3.5" (9 cm)
- Water
- Nutrient agar
- Microwaveable bowl
- Cotton swabs
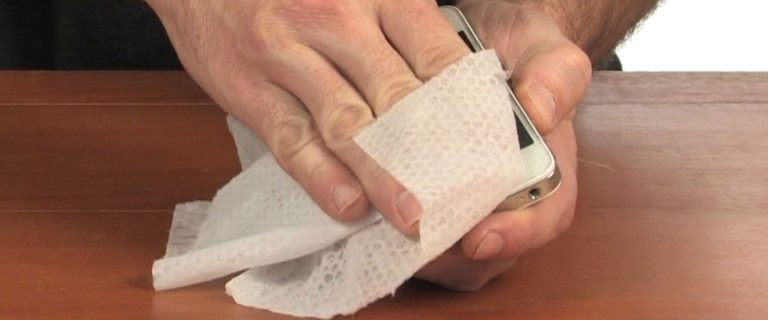
- Sanitizing wipes
- Microwave oven
- Zipper-lock bags
- Adult supervision
- **Get all the materials you need in the Science Fair Lab "Growing Bacteria" **
Experiment Videos
Experiment
1
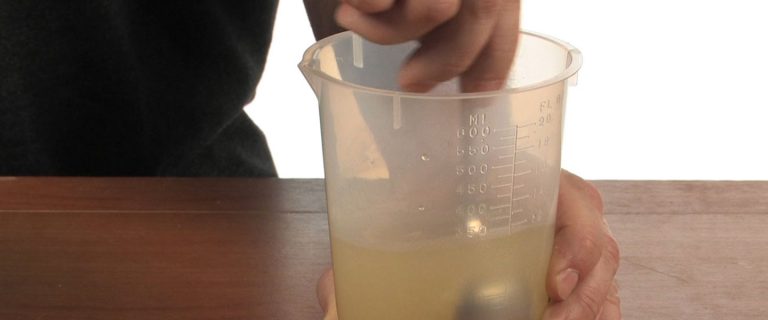
To get started, you’ll need to make your agar and fill some petri dishes. Use a clean, microwave-safe container to mix the agar with water and then boil it. A quart-sized bowl works great. These proportions make enough nutrient agar to prepare two petri dishes. Stir these together well:
- ½-teaspoon agar (1 1/5 grams)
- ¼ cup (60 milliliters) of hot water

2
- Bring the agar mixture to a boil for three minutes to completely dissolve the agar.
CAUTION: Adult supervision is required to boil water. If you are using a microwave oven to boil the mixture, be careful not to let it boil over. The mixture should be clear with no particles floating in it after boiling.

3
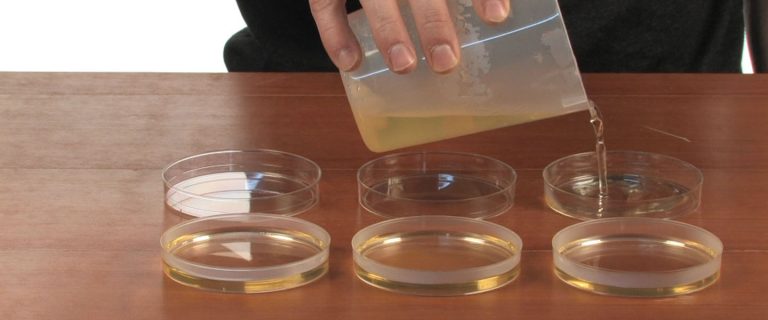
Remove the mixture from the microwave or the stovetop and allow it to cool for three to five minutes before moving on to the next step.
4
Take the lid off of the petri dish and carefully cover the bottom half of the petri dish with the warm nutrient agar mixture.
5
Loosely cover the bottom portion and allow the mixture to cool and harden for at least an hour. You can offset the lid so excess moisture can escape.
- NOTE: Just like gelatin, agar needs to boil for a certain amount of time to properly gel. If necessary, pour any unset mixture in each Petri dish back into the bowl and microwave it again until you see it boil. Watch it boil for 10-15 seconds before turning off the microwave, but don’t let it boil over. Make sure there are no floating particles. Pour the hot agar mixture back into the dishes just like before and it should solidify within an hour.

6
Once the agar is set and cooled, it’s time to collect some bacteria on the end of a cotton swab. Roll a clean cotton swab in your mouth or test something even more gross, like the keys on a computer, a cell phone case, the pump handle of a soap dispenser or the remote control.
- NOTE: You might want to collect a sample from a computer keyboard on half of the Petri dish and leave the other half for the test in Steps 8 and 9. Remember, you must use clean cotton swabs for each sample. In order to get a good sample, lightly dampen the cotton swab with water. Be sure to roll the swab on the surface you’re testing so that it’s completely covered and has picked up as much bacteria as possible. You want to cover the entire cotton end of the swab with invisible bacteria.

7
Lift the lid off the petri dish and lightly draw a squiggly line in the agar with the end of the cotton swab. Roll the swab in your fingers as you draw the line. Replace the lid and label the dish with the date and the name of the item you tested.
- NOTE: Moisture coming from the agar can be a problem. Many people turn the petri dish over during this time to prevent moisture from dripping onto the growing colonies.
-
SUGGESTION: Place no more than a drop of a hand sanitizing gel in the middle of one of the squiggles. The hypothesis is that the antibacterial chemical in hand sanitizer will keep bacteria from growing there.
8
Use a sanitizing wipe to thoroughly clean one of the surfaces you tested in Step 6.

9
With a clean swab, redo the squiggle test in the other half of the Petri dish from Step 6 to confirm your cleaning efforts.
10
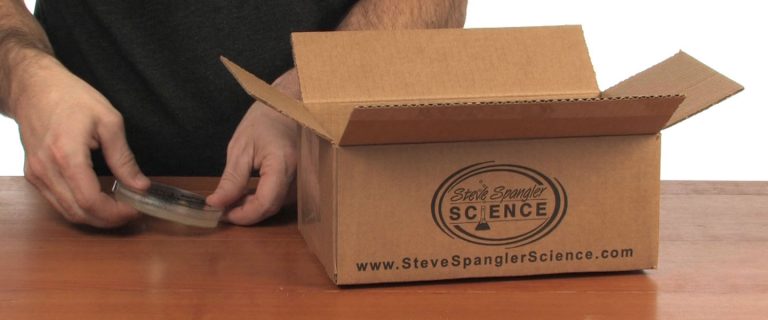
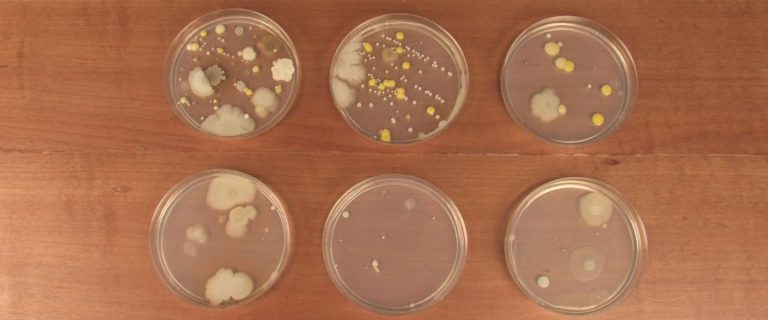
Before growing anything, some people place each Petri dish into separate zipper-lock bags. Place the upside down dishes into a warm, dark place to grow. A temperature around 98 degrees Fahrenheit (37 degrees Celsius) is best, like in a closed container on top of a cable box. In a short time, you’ll be greeted by an amazing variety of bacteria, molds and fungi. You likely see more and larger colonies over the next few days. You shouldn’t see too much growth where the hand sanitizer was used — you might even see a halo around each location, which is called the kill zone. Measure and compare the size of the kill zone to determine the effectiveness of different antibacterial agents.
- REMEMBER: Do not open the dishes once things begin to grow. You could be culturing some serious bacteria and not even know it. The comfort is that they were around you all the time anyway and now you can see them. Just be careful.
11
Bacteria, like what you’re growing, will often stink and make their presence known after a short time. These are not toys or curiosities you’re growing. Proper disposal is essential for both safety and sanitation. Seal all the petri dishes in larger zipper-lock plastic bags. You can add a generous shot of chlorine bleach to the bag before sealing for an extra level of destruction.
- REMEMBER: When you’re done, do not open the bags. After you’ve analyzed the cultures, dispose of the sealed bag containing the petri dishes with bacteria into the trash.
At the end of the growing period, observe the petri dishes and write down, draw or photograph what you see. Turns out, Mom is right — it is super important to wash your hands with soap and warm water whenever you can.
How Does It Work
You’re likely to have a huge variety of colors, shapes and smells in your tiny worlds. Count the number of colonies on the plate, note the differences in color, shape and other observable properties. Getting bacteria to grow can be a little tricky, so don’t get discouraged if you have to make more than one attempt. Allow enough time for them to grow, too. You need millions of them in one place just to see them at all. They’re that tiny. In a lab, you’d use your trusty inoculating loop to pick up a bit of the bacteria in order to create a slide for further study under a microscope. Compare the number, color and size of colonies grown from different test locations. Which part of your home has the most bacteria? Which one surprised you the most?
Science Fair Connection
Growing bacteria in a petri dish is not a science fair experiment on its own. It may be gross, cool and fascinating, but it doesn’t meet all the requirements of a science fair project. If you want to do a science fair project about germs, you have to add a variable, or something that changes in the experiment.
In the Growing Bacteria activity described above, adding an anti-bacterial hand sanitizer is a variable. Make one dish of germs and one dish of germs with a drop of the anti-bacterial sanitizer. Better yet, make three dishes: one as the control (just germs), one with an anti-bacterial sanitizer and a third dish with a different brand of anti-bacterial sanitizer. Then you can see which anti-bacterial sanitizer is more effective at killing germs. Make sure all three petri dishes have germs collected from the same place and at the same time, so you know they are all exposed to the same bacteria. The dishes also need to be grown in the same warm, dark place for the same amount of time, so that the conditions are standardized as much as possible.
You can do other variations as well. Sample the germs on your hand before and after washing them. Test various surfaces in the bathroom to see which one has the most germs or the greatest variety of bacteria.
Growing Bacteria is such a popular activity that we’ve turned it into a sample science fair project. The project describes the swabbing technique to collect the germs and gives you lots of helpful tips for growing bacteria. It even suggests variables and offers some ideas to make the project your own. What it doesn’t give you is the data. What fun would that be? You’ll want to do the experiment for yourself to test your own ideas and make your own discoveries.
Safety Information
Most bacteria collected in your environment will not be harmful. However, once they multiply into millions of colonies, they become more of a hazard. Be sure to protect open cuts with rubber gloves and never ingest or breathe in the growing bacteria. Keep your petri dishes sealed in the zipper-lock bags for the entire experiment. When you’re finished with the experiment, some people recommend placing the petri dish bag in a larger zipper-lock bag, along with a few drops of bleach. Seal the larger bag and dispose of it in the trash.
Related Products